Mastering the Hand-Drawn Look with Photoshop Pencil Brush
There is a specific kind of trust that builds when an audience sees something that looks like it was made by human hands. In a digital landscape saturated with perfect vectors, glossy gradients, and sterile sans serif fonts, the imperfection of a sketch stands out. It signals effort, authenticity, and a personal touch. This is exactly where the Photoshop Pencil Brush shines. Unlike standard digital tools that often feel too clean or rigid, this brush simulates the actual friction of graphite against paper, giving your projects a handcrafted feel that resonates deeply with viewers.
When you apply this tool to your workflow, you aren't just adding texture; you are injecting personality. The visual characteristics of a high-quality pencil simulation include variable line weight, subtle grain, and the occasional skip or rough edge that occurs in real life. These nuances prevent your designs from looking "computer-generated." Whether you are a brand strategist refining a logo concept or a content creator whipping up social media graphics, the ability to toggle between a crisp digital line and a rough, organic stroke allows for a dynamic range of expression. It bridges the gap between traditional illustration and modern web design, making your assets feel approachable and warm.
Where Organic Texture Meets Professional Strategy
The utility of a Photoshop Pencil Brush extends far beyond simple doodling. For entrepreneurs and small business owners, branding is about differentiation. Using these strokes in your logo design or packaging design can soften a corporate image, making a tech startup feel more human or a luxury product feel more artisanal. Imagine a coffee bag label where the roast notes are highlighted with a sketched underline, or a tech company's whitepaper that uses hand-drawn diagrams to explain complex data. These elements break up the monotony of text-heavy layouts and guide the reader's eye naturally.
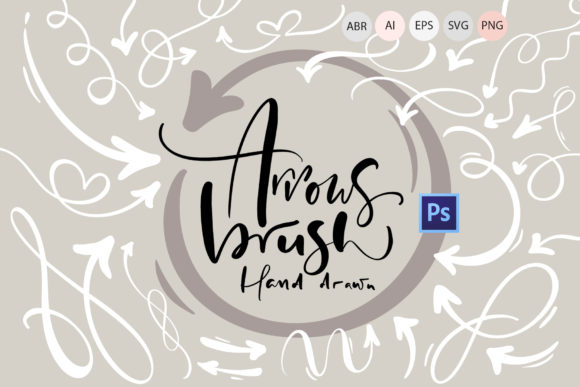
In the realm of editorial design and publishing, this tool is invaluable for creating custom drop caps, marginalia, and emphasis marks that feel integrated rather than pasted on. Marketers often struggle to make ads feel less intrusive; a hand-sketched arrow pointing to a call-to-action or a roughly shaded background behind a testimonial can lower the viewer's defenses. It feels less like an advertisement and more like a note from a friend. For bloggers and hobbyists, using these brushes in social media graphics adds a layer of creativity that stock photos simply cannot match. It tells your audience that you care enough about the details to customize every pixel.
The influence on brand identity is profound. Consistency is key, but so is character. By incorporating pencil textures into your visual hierarchy, you establish a tone that is both professional and accessible. It suggests that behind the screen, there is a creative mind at work. This perception boosts engagement because people connect with humanity, not algorithms. When used correctly, these strokes do not detract from readability; instead, they enhance it by creating focal points and separating content blocks without the need for harsh lines or boxes.
Integrating Hand-Drawn Elements into Your Workflow
To get the most out of these tools, you need to treat them with the same intentionality as you would a premium font or a color palette. The goal is balance. If your base layout relies on a clean sans serif font for body copy, introducing a Photoshop Pencil Brush for headers or accents creates a sophisticated contrast. However, if you overuse the texture, the design can look messy or unfinished. Think of the pencil strokes as a spice; a little enhances the flavor, but too much ruins the dish.
When evaluating project fit, ask yourself what emotion you want to evoke. Are you aiming for nostalgia? Precision with a twist? Playfulness? A handwritten font paired with digital pencil strokes can create a cohesive "notebook" aesthetic, while pairing them with a bold serif font can create an elegant, editorial look suitable for high-end magazines or invitations. Always test your font pairing alongside the brush strokes to ensure the weights complement each other. A heavy, dark pencil stroke might overwhelm a light, airy typeface, whereas a delicate hatching pattern might get lost against a bold display header.
Readability remains the priority. While the charm of the sketch lies in its irregularity, ensure that any text created or underlined with these brushes remains legible across different devices. What looks great on a retina desktop monitor might blur into noise on a mobile screen. Always preview your design assets at various scales. Furthermore, consider the medium. For print projects, ensure your brush settings are at a high enough resolution to capture the grain without pixelation. For digital use, optimize the file size so your website loads quickly without sacrificing the quality of the texture.
Technical Setup and Best Practices
Getting started is straightforward, but proper installation ensures the brushes behave predictably within your software. Most professional packs come as ABR Files, which are native to Adobe Photoshop. To install them, simply open Photoshop, select the Brush Tool, and click the gear icon in the options bar to choose "Import Brushes." Navigate to your downloaded ABR file, and your new toolkit will appear at the bottom of your brush list. Some creators prefer dragging and dropping the file directly onto the open Photoshop canvas, which also works instantly.
- Organize Your Library: Once installed, group your pencil brushes into a dedicated folder within the brush panel. This saves time when you are in the flow of creation and need a specific texture quickly.
- Adjust Dynamics: Don't rely solely on default settings. Explore the "Shape Dynamics" and "Transfer" tabs in the Brush Settings panel. Adjusting opacity jitter and size pressure based on pen tilt can mimic the way a real pencil reacts to hand pressure, adding even more realism.
- Layer Management: Always use pencil strokes on separate layers. This allows you to adjust blending modes later. Changing a layer from "Normal" to "Multiply" often integrates the graphite texture more naturally with the colors beneath it, simulating how real pencil sits on paper.
- Experiment with Blending: Try using the smudge tool gently on your pencil strokes to create shading effects that look like finger-smudged graphite, adding depth to your illustrations.
Before committing to a commercial font or a specific brush pack for a client project, always review the licensing terms. While many resources are free for personal use, commercial applications often require a purchased license. This protects both you and the creator. If you are building a brand identity that will be used globally, investing in a licensed, high-quality asset ensures you have the legal right to use it across all mediums, from billboards to app icons.
Ultimately, the Photoshop Pencil Brush is more than just a filter; it is a gateway to a more expressive design language. It empowers you to break the grid, soften the edges, and infuse your work with the warmth of human creation. Whether you are drafting a quick concept or finalizing a polished deliverable, these tools remind us that even in the digital age, the hand of the artist still matters. If you encounter any issues during installation or have questions about specific techniques, remember that the design community is vast and supportive; don't hesitate to reach out to fellow creators or the asset developers for guidance.