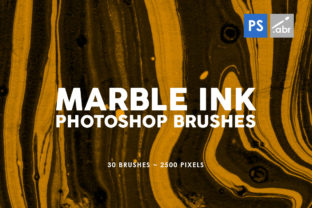
Elevate Your Designs with 30 Marble Ink Photoshop Stamp Brushes 3
Digital design often suffers from a sterile, overly polished look that fails to connect emotionally with viewers. When every line is perfectly vector-sharp and every color sits in a flat digital space, the work can feel cold. This is where organic texture becomes essential. The 30 Marble Ink Photoshop Stamp Brushes 3 collection offers a solution by introducing the chaotic beauty of real-world materials into your digital canvas. With 30 unique brushes inside, each rendered at a massive 2500 pixels, this set provides the high-resolution fidelity needed for professional print and large-scale digital projects. Whether you are a seasoned graphic designer, a social media manager, or a hobbyist looking to upgrade your photo edits, understanding how to leverage these tools correctly can transform average compositions into standout visual experiences.
However, acquiring high-quality assets is only half the battle. Many creators download premium brush sets like this one and immediately fall into traps that diminish the potential of the tool. The most common error is treating stamp brushes as simple stickers rather than dynamic design elements. Because these marble ink textures are pre-rendered stamps, there is a temptation to just click once and move on. While this works for quick mockups, it often leads to repetitive patterns that look artificial. To truly benefit from the 30 Marble Ink Photoshop Stamp Brushes 3, you must approach them with an eye for composition and layering.
Avoiding the Trap of Repetition and Low Resolution
One significant misunderstanding involves resolution expectations. In the world of digital assets, "high resolution" is a term thrown around loosely. Some brush packs claim to be high-res but pixelate instantly when scaled up for a poster or a large banner. This specific collection distinguishes itself by offering a 2500 pixels size for every brush. This is not merely a technical specification; it is a workflow safeguard. If you attempt to use lower-resolution brushes for print templates, you risk delivering a final product that looks grainy and unprofessional to your client.
Before you begin applying these textures, check your document settings. A frequent mistake is working in RGB mode at 72 DPI when the final output requires CMYK at 300 DPI. While the 30 Marble Ink Photoshop Stamp Brushes 3 are versatile enough to work with any Photoshop version, starting your project in the wrong color mode can alter the way the ink tones appear, especially if you are simulating traditional printing methods. Always verify your project requirements first. If you are designing for social media, the 2500-pixel depth allows you to crop and zoom without losing detail, ensuring your Instagram stories or Facebook headers remain crisp on high-density mobile screens.
Misusing Blending Modes and Opacity
Another area where designers often stumble is the application of blending modes. When you stamp a marble ink texture onto a photo, the default "Normal" mode often looks like a solid block of paint sitting on top of the image. This destroys the underlying detail of your photograph and creates a disjointed, amateurish aesthetic. The power of these brushes lies in their interaction with the layers beneath them.
To correct this, experiment immediately with blending modes such as Multiply, Overlay, Soft Light, or Screen. For dark ink textures on light backgrounds, Multiply usually yields the most natural result, allowing the white of the paper to show through while the ink stains the surface. Conversely, if you are using lighter marble veins over a dark background, Screen or Overlay can create a glowing, integrated effect. Do not be afraid to lower the opacity of the brush stamp. A subtle hint of texture at 30% opacity often adds more sophistication than a bold, 100% opaque stamp. This nuanced approach prevents the texture from overpowering your main subject, whether it is a product shot, a portrait, or a typographic layout.
Overlooking Versatility in Project Types
It is easy to pigeonhole texture brushes as solely useful for grunge posters or vintage flyers. This limited mindset causes many users to miss out on the broader applications of the 30 Marble Ink Photoshop Stamp Brushes 3. These textures are incredibly adaptable. For instance, entrepreneurs creating brand identity kits can use these marble strokes to add a touch of luxury and unpredictability to business cards or letterheads. The organic flow of the ink breaks up the rigidity of corporate grids, making the brand feel more human and approachable.
Bloggers and content creators can utilize these stamps as decorative elements to frame text or separate sections in long-form articles. Instead of a standard horizontal line, a sweeping marble ink stroke adds visual interest and guides the reader's eye naturally. Furthermore, educators creating presentation slides can use these textures as subtle backgrounds to reduce eye strain and add depth, moving away from the bland, solid-color slides that dominate conference rooms. The key is to view the texture not as the main event, but as a supporting actor that enhances the overall narrative of your design.
Practical Steps for Better Integration
To ensure you get the most value from this asset pack, consider adopting a few best practices before you start your next project:
- Test Before Committing: Create a test file and stamp all 30 brushes to see their variations. Some may be dense and heavy, while others might be wispy and light. Knowing the character of each brush saves time during the actual design process.
- Layer for Depth: Don't rely on a single stamp. Build complexity by layering multiple brushes with different opacities and blending modes. This mimics the natural accumulation of ink in traditional art.
- Mask Strategically: Use layer masks to erase parts of the stamp that interfere with critical elements like faces or product logos. This ensures the texture enhances rather than obscures your focal point.
- Colorize with Care: While the default black ink is classic, remember you can hue/saturate these layers to match your brand palette. However, avoid oversaturating, which can make the texture look digital and fake.
Ultimately, the goal of using tools like the 30 Marble Ink Photoshop Stamp Brushes 3 is to bridge the gap between digital precision and analog warmth. By avoiding the pitfalls of repetition, ignoring resolution limits, and misapplying blending modes, you can elevate the quality of your work significantly. Whether you are preparing a print template for a local business or crafting a social media campaign for a global audience, these high-resolution assets provide the flexibility and quality needed to succeed. Take the time to understand the tool, experiment with its settings, and apply it with intention. Your audience will notice the difference in the richness and authenticity of your final designs.