Mastering Procreate Brush Calligraphy: A Practical Workflow for Digital Lettering
Digital lettering has transformed from a niche hobby into a core component of modern creative workflows. For professionals ranging from graphic designers to small business owners, the ability to produce high-quality, custom typography quickly is a valuable asset. Procreate Brush Calligraphy serves as a bridge between traditional pen-and-ink techniques and the efficiency of digital production. When you enjoy making calligraphy in the Procreate app, selecting the right brush set is not merely an aesthetic choice; it is a strategic decision that impacts your speed, consistency, and final output quality. This guide explores how to integrate specialized calligraphy brushes into your daily routine, ensuring they enhance rather than complicate your creative process.
Integrating Digital Calligraphy into Professional Workflows
Incorporating Procreate Brush Calligraphy into a broader project requires more than just opening the app and drawing. It demands a structured approach where the tool fits seamlessly before, during, and after the main creative push. For marketers and content creators, these brushes often serve as the initial sketching phase for social media graphics or logo concepts. Before committing to vector software like Adobe Illustrator, many freelancers use Procreate to rapidly iterate on letterforms. This "rough draft" stage allows for organic experimentation that rigid vector tools sometimes stifle.
During the execution phase, the reliability of your brush set dictates your efficiency. A well-calibrated brush responds to pressure and tilt exactly as expected, reducing the need for constant undoing and re-stroking. This consistency is crucial for educators creating instructional materials or publishers designing book covers where typographic harmony is non-negotiable. After the initial creation, these digital strokes often move into post-production. They might be exported as PNGs with transparent backgrounds for immediate use in Canva or Photoshop, or traced over to create scalable vector assets. Understanding where Procreate Brush Calligraphy fits in this chain helps you allocate time effectively, preventing bottlenecks in your delivery schedule.
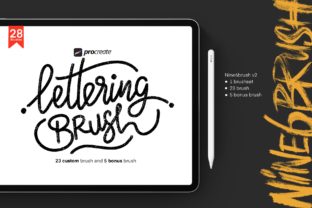
The Essential Toolkit: 15 Specialized Calligraphy Brushes
To achieve professional results, one needs a diverse arsenal. A standard round brush rarely suffices for the nuances of script and display lettering. Below is a detailed breakdown of 15 specific brush types designed to handle various stages of the calligraphic process, from thick downstrokes to delicate hairlines.
- The Classic Dip Pen: Mimics the sharp entry and exit of a metal nib, ideal for traditional Copperplate styles.
- Pressure-Controlled Script: Engineered for extreme sensitivity, allowing smooth transitions between thick and thin lines based solely on Apple Pencil pressure.
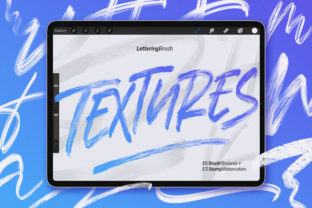
- Dry Ink Texture: Adds a subtle grain to strokes, perfect for vintage-inspired designs that need to look printed rather than digital.
- Monoline Weight: Maintains a consistent stroke width regardless of pressure, essential for building block letters or underlining.
- Broad Edge Marker: Simulates a chisel-tip marker, excellent for Gothic or Blackletter calligraphy foundations.
- Watercolor Bleed: Creates soft edges that mimic ink spreading on paper, adding depth to decorative flourishes.
- Quick Dry Gouache: Offers opaque coverage with a matte finish, useful for layering text over colorful backgrounds.
- Fine Liner Detail: A ultra-thin brush for correcting imperfections or adding intricate swashes without cluttering the main form.
- Charcoal Soft: Provides a fuzzy edge for rough sketching layouts before committing to clean ink lines.
- Neon Glow: Designed for digital-first projects like Instagram stories, offering a luminous edge that pops on dark modes.
- Rough Edge Brush: Introduces intentional irregularity to strokes, giving a hand-lettered, imperfect charm to corporate branding.
- Smudge Blender: While not a drawing brush, this tool is vital for softening harsh transitions between overlapping strokes.
- Double Stroke: Automatically creates parallel lines, speeding up the creation of outlined text effects.
- Tapered Start/End: Ensures every stroke begins and ends with a natural point, eliminating the need for manual erasing of blunt edges.
- High-Friction Paper: Alters the glide of the pencil to feel like dragging across textured cardstock, improving control for slow, deliberate strokes.
Selecting the right brush from this list depends on the specific outcome you desire. For instance, a blogger creating Pinterest pins might prioritize the Neon Glow or Dry Ink Texture for visual impact, while a wedding invitation designer would lean heavily on the Classic Dip Pen and Watercolor Bleed for elegance. The key is organization; keep these brushes in a dedicated group within Procreate to minimize search time during tight deadlines.
Personalizing Your Brand: 5 Signature Brushes
Beyond general lettering, professionals often need a unique signature for contracts, certificates, or branding watermarks. Generic fonts rarely convey the authenticity of a real handwritten sign-off. Creating or utilizing specific Procreate Brush Calligraphy presets for signatures can streamline this repetitive task. Here are five brush configurations tailored for signature work:
- The Executive Flow: A fast-drying ink brush with moderate taper, designed for quick, confident strokes that mimic a busy professional's rapid signing style.
- The Artistic Flourish: Includes built-in sway settings to automatically add elegant loops to ascenders and descenders, perfect for creatives selling prints.
- The Minimalist Dot: A clean, monoline brush with no texture, ideal for tech entrepreneurs who prefer a sleek, modern aesthetic.
- The Bold Stamp: A heavy-weight brush that creates thick, impactful initials, suitable for logos or YouTube channel watermarks.
- The Variable Speed: Reacts not just to pressure but to the speed of your hand movement, creating dynamic thick-to-thin variations that look incredibly natural.
Using these signature brushes involves a simple workflow: create a new canvas, write your signature once using the chosen brush, refine the vector shape if necessary, and save it as a PNG sticker. This asset can then be dragged and dropped onto documents or designs instantly, maintaining brand consistency without the need to sign physically every time.
Optimizing Usability and Long-Term Consistency
The true value of Procreate Brush Calligraphy lies in its long-term usability. A brush set that looks great on day one but becomes frustrating due to lag or inconsistent opacity will eventually be abandoned. To ensure these tools remain part of your core toolkit, focus on preparation and compatibility. Always test new brushes on the specific iPad model you use for client work, as older processors may struggle with complex texture algorithms found in high-detail brushes.
Organization is another critical factor. As your library grows, naming conventions become vital. Instead of generic names like "Brush 1," label them by function, such as "Script_Thick_Downstroke" or "Signature_Fast." This practice saves precious minutes during live client calls or when inspiration strikes unexpectedly. Furthermore, consider backing up your customized brush sets to cloud storage. Digital assets are just as important as physical tools, and losing a curated collection can halt production.
Quality control also extends to how these brushes interact with other elements in your design. When overlaying calligraphy on photographs or complex patterns, ensure the brush opacity and blending modes are adjusted correctly. A Watercolor Bleed brush might look stunning on white but could disappear against a dark background unless the blending mode is switched to "Screen" or "Overlay." Understanding these interactions prevents rework and ensures the final deliverable meets professional standards.
Final Thoughts on Implementation
Adopting Procreate Brush Calligraphy is not about replacing traditional skills but enhancing them with digital flexibility. Whether you are a freelancer pitching a new logo concept, an educator designing worksheets, or a marketer crafting campaign visuals, the right brush set empowers you to execute ideas with speed and precision. By treating these digital tools with the same care as physical pens—maintaining them, organizing them, and understanding their specific behaviors—you integrate them smoothly into your workflow. The result is a more efficient creative process that yields high-quality, authentic typography tailored to your unique professional needs.